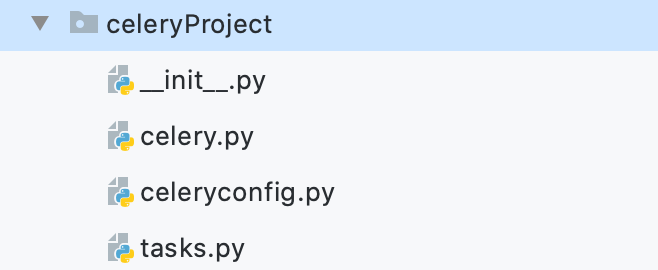
项目的结构:
celeryProject/__init__.py
    /celery.py
    /celeryconfig.py
    /tasks.py
celeryProject/celery.py
from celery import Celery

# 创建celery实例
app = Celery('demoTasks')

# 从配置文件导入配置
app.config_from_object('celeryconfig')

# 自动搜索任务
app.autodiscover_tasks(['celeryProject']) # 自动搜索【‘’】目录下的任务
"""
Arguments:
    packages (List[str]): List of packages to search.
        This argument may also be a callable, in which case the
        value returned is used (for lazy evaluation).
    related_name (Optional[str]): The name of the module to find.  Defaults
        to "tasks": meaning "look for 'module.tasks' for every
        module in ``packages``.".  If ``None`` will only try to import
        the package, i.e. "look for 'module'".
    force (bool): By default this call is lazy so that the actual
        auto-discovery won't happen until an application imports
        the default modules.  Forcing will cause the auto-discovery
        to happen immediately.
"""
celeryProject/celeryconfig.py
broker_url = "redis://@localhost:6379/1"
result_backend = "redis://@localhost:6379/2"
celeryProject/tasks.py
from celeryProject.celery import app as celery_app
import time

@celery_app.task
def task1():
    print("task1任务开始...")
    time.sleep(3)
    print("task1任务结束...")


@celery_app.task
def task2(a, b):
    if isinstance(a, int) and isinstance(b, int):
        return a + b
    print('参数有误.')
celery -A celeryProject worker -l info
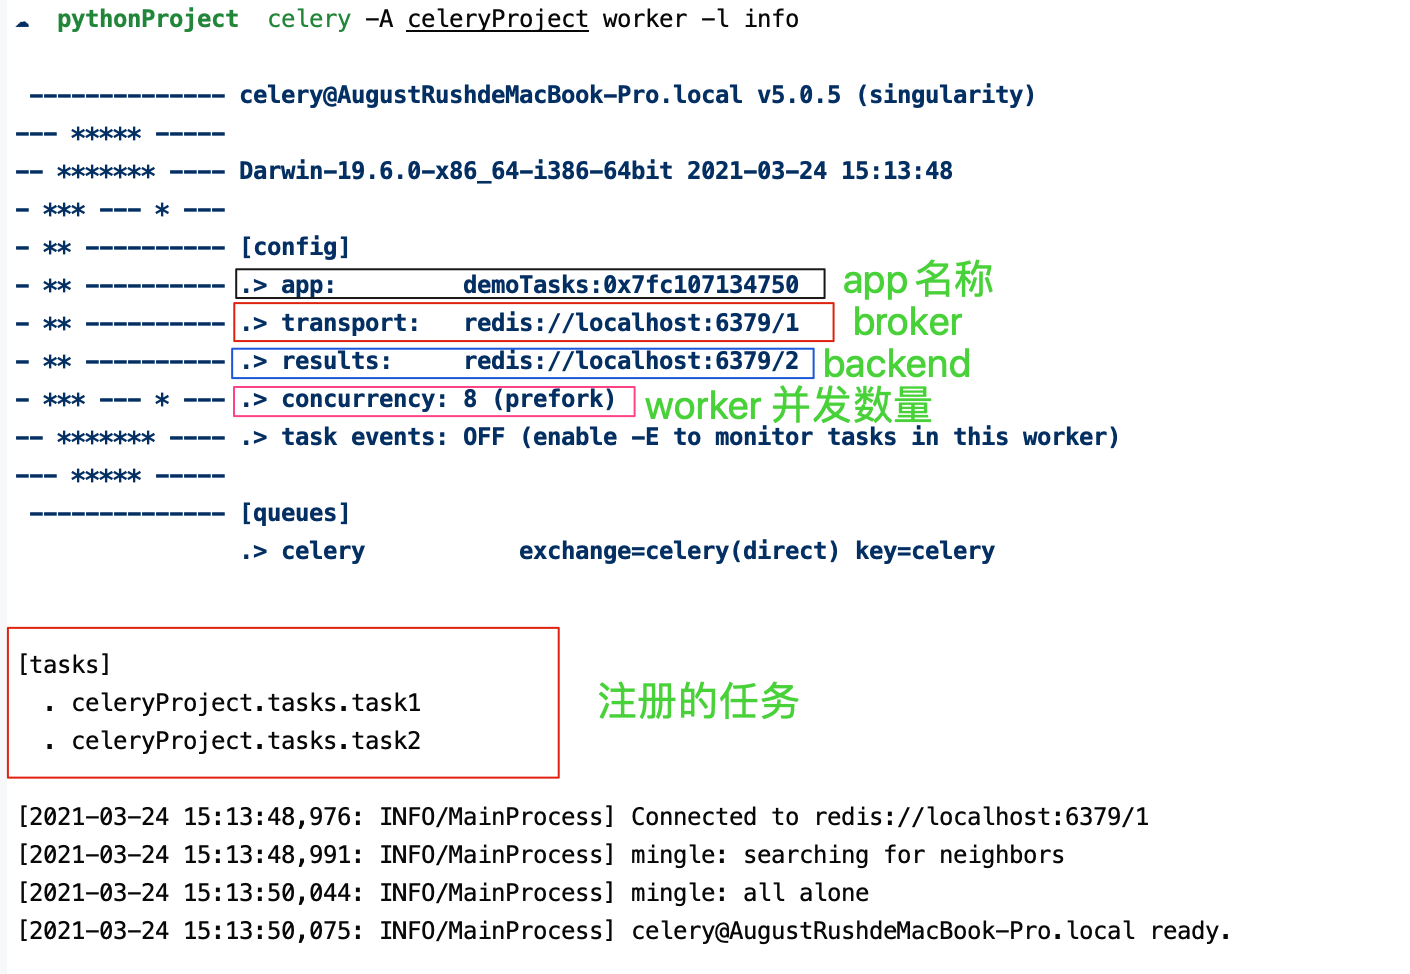
concurrency:为同时处理任务的工作进程数量,所有的进程都被占满时,新的任务需要进行等待其中的一个进程完成任务才能执行进行任务。
默认的并发数为当前计算机的CPU数,可以通过设置celery worker -c进行自定义设置并发数。
使用control + c就可以停止职程
在生产环境中,如果需要后台运行worker,可以使用celery multi命令在后台启动一个或多个worker:
$ celery multi start w1 -A proj -l info

也可以进行重启:
$ celery multi restart w1 -A proj -l info
停止运行:
$ celery multi stop w1 -A proj -l info
stop命令是异步的,所以不会等待worker关闭。可以通过stopwait命令进行停止运行,可以保证在退出之前完成当前正在执行的任务:
$ celery multi stopwait w1 -A proj -l info
通过delay()方法进行调用:
>>> from celeryProject.tasks import task1, task2
>>> task1.delay()
<AsyncResult: 8823fa65-4a36-4737-9ba0-1572ec56aa4a>
尽管delay()方法运行十分方便,但是如果像设置额外的行参数,必须使用apply_async。
也可以使用apply_async(),该方法可让我们设置一些任务执行的参数,例如:任务多久之后才执行,任务被发送到哪个队列中等待。
>>> task2.apply_async((2,2), countdown=3)
任务task2将会在发送3秒之后执行。

如果我们直接执行任务函数,将会直接执行此函数在当前进程中,并不会向broker发送任何消息。
无论是delay()还是apply_async()方式都会返回AsyncResult对象,方便跟踪任务执行状态,但需要我们配置result_backend。
每一个被吊用的任务都会被分配一个ID,我们叫Task ID。
Celery可以使用delay()方法来调用任务,并且这也是非常常用的。但是有时候并不想简单的将任务发送到队列中,我们想将一个任务函数(由参数和执行选项组成)作为一个参数传递给另外一个函数中,为了实现此目标,Celery使用一种叫做signatures的东西。
signature()包装了任务调用的参数、关键词参数和执行选项,以便传递给函数,甚至可以序列化后通过网络进行传输。
>>> from celery import signature

>>> signature('celeryProject.tasks.add', args=(2, 2), countdown=10)
tasks.add(2, 2)
这个任务签名具有两个参数:(2, 2),以及countdown为10的执行选项。
还可以使用任务的签名方法来创建签名:
>>> from celeryProject.tasks import add
>>> add.signature((2, 2), countdown=10)
tasks.add(2, 2)

# 其简化快捷方式
>>> add.s(2, 2)
tasks.add(2, 2)
from celery import signature
from celeryProject.tasks import add

add = add.signature((2, 2)) # 链式调用 add.signature((2, 2)).delay()
add.delay() # 等同于 add.apply_async()
这些primitives本身就是signature对象的集合,因此它们可以以多种方式组合成复杂的工作流程。
tasks.py
from proj.celery import app as celery_app

# 创建任务函数
@celery_app.task
def my_task1(a, b):
    print("任务函数(my_task1)正在执行....")
    return a + b

@celery_app.task
def my_task2(a, b):
    print("任务函数(my_task2)正在执行....")
    return a + b

@celery_app.task
def my_task3(a, b):
    print("任务函数(my_task3)正在执行....")
    return a + b
group_work.py
from celeryProject.tasks import my_task1
from celeryProject.tasks import my_task2
from celeryProject.tasks import my_task3
from celery import group

# 将多个signature放入同一组中
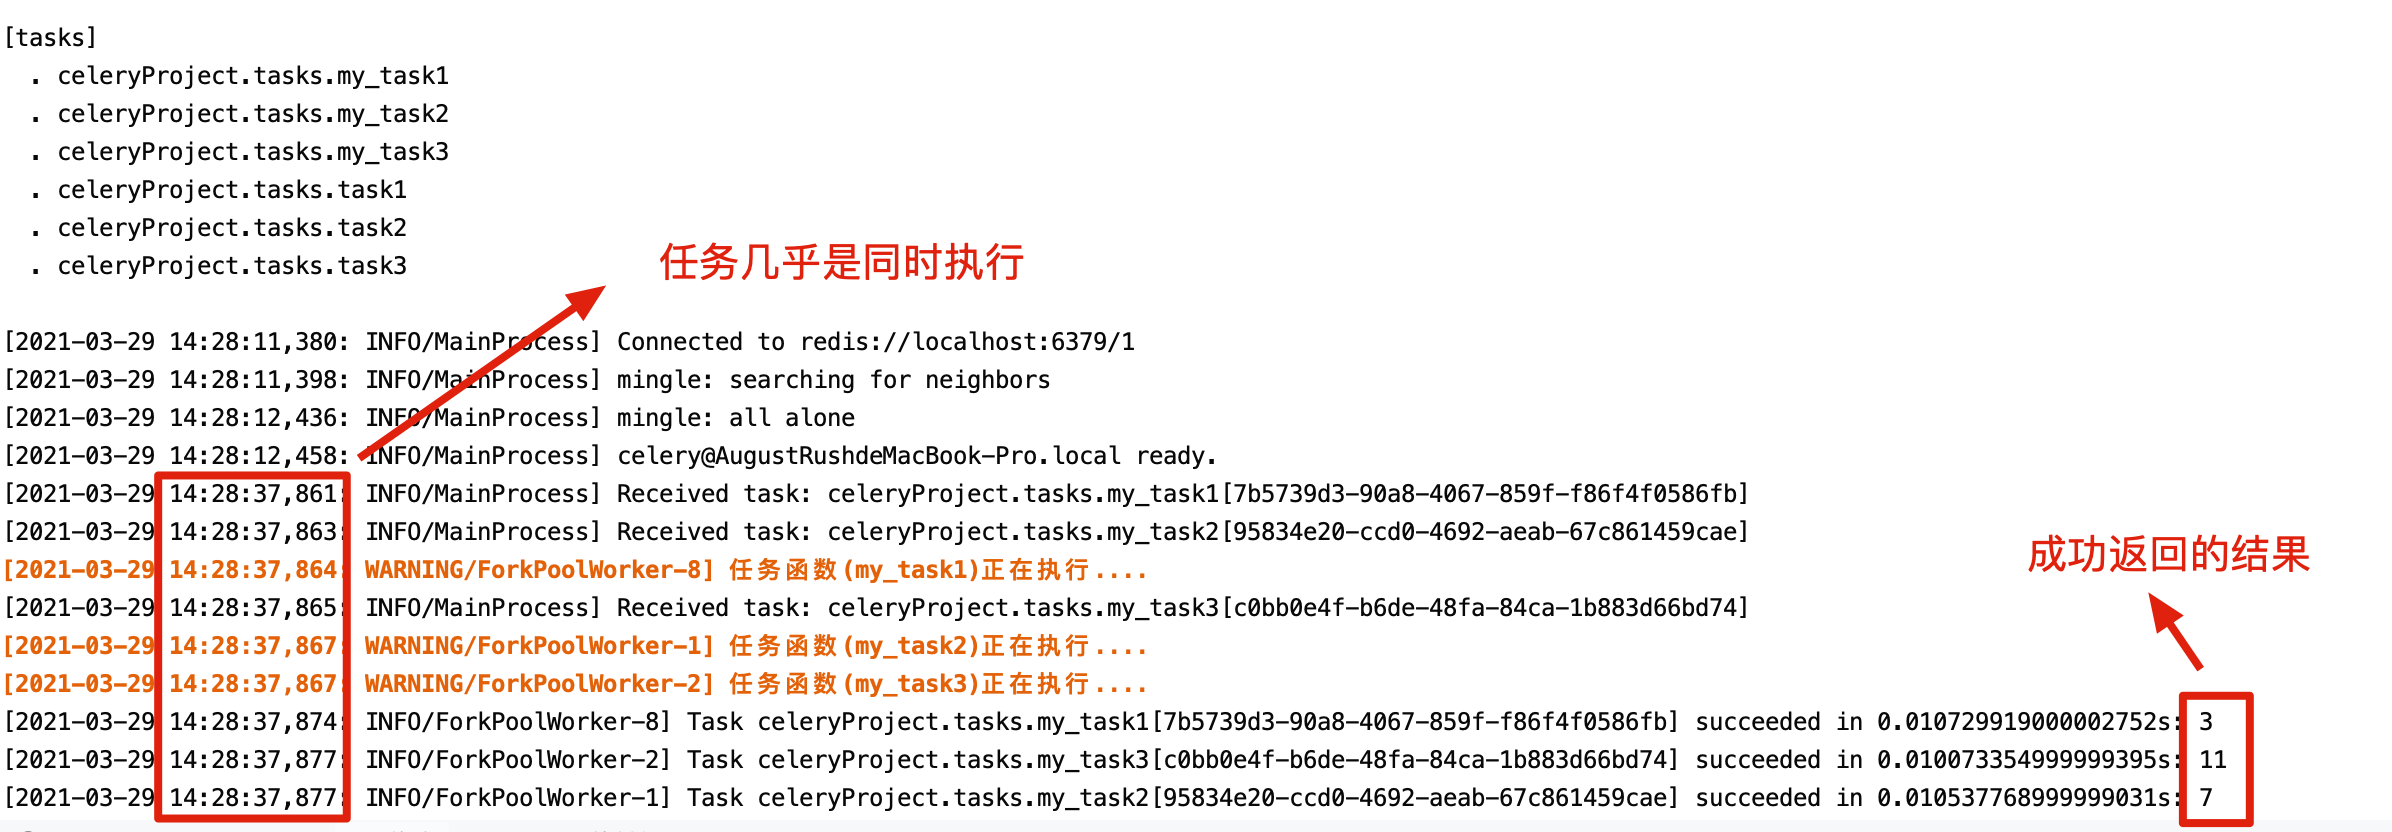
my_group = group((my_task1.s(10, 10), my_task2.s(20, 20), my_task3.s(30, 30)))
ret = my_group() # 执行组任务
print(ret.get())  # 输出每个任务结果
# [20, 40, 60]

chain_work.py
from celeryProject.tasks import my_task1
from celeryProject.tasks import my_task2
from celeryProject.tasks import my_task3
from celery import chain

# 将多个signature组成一个任务链
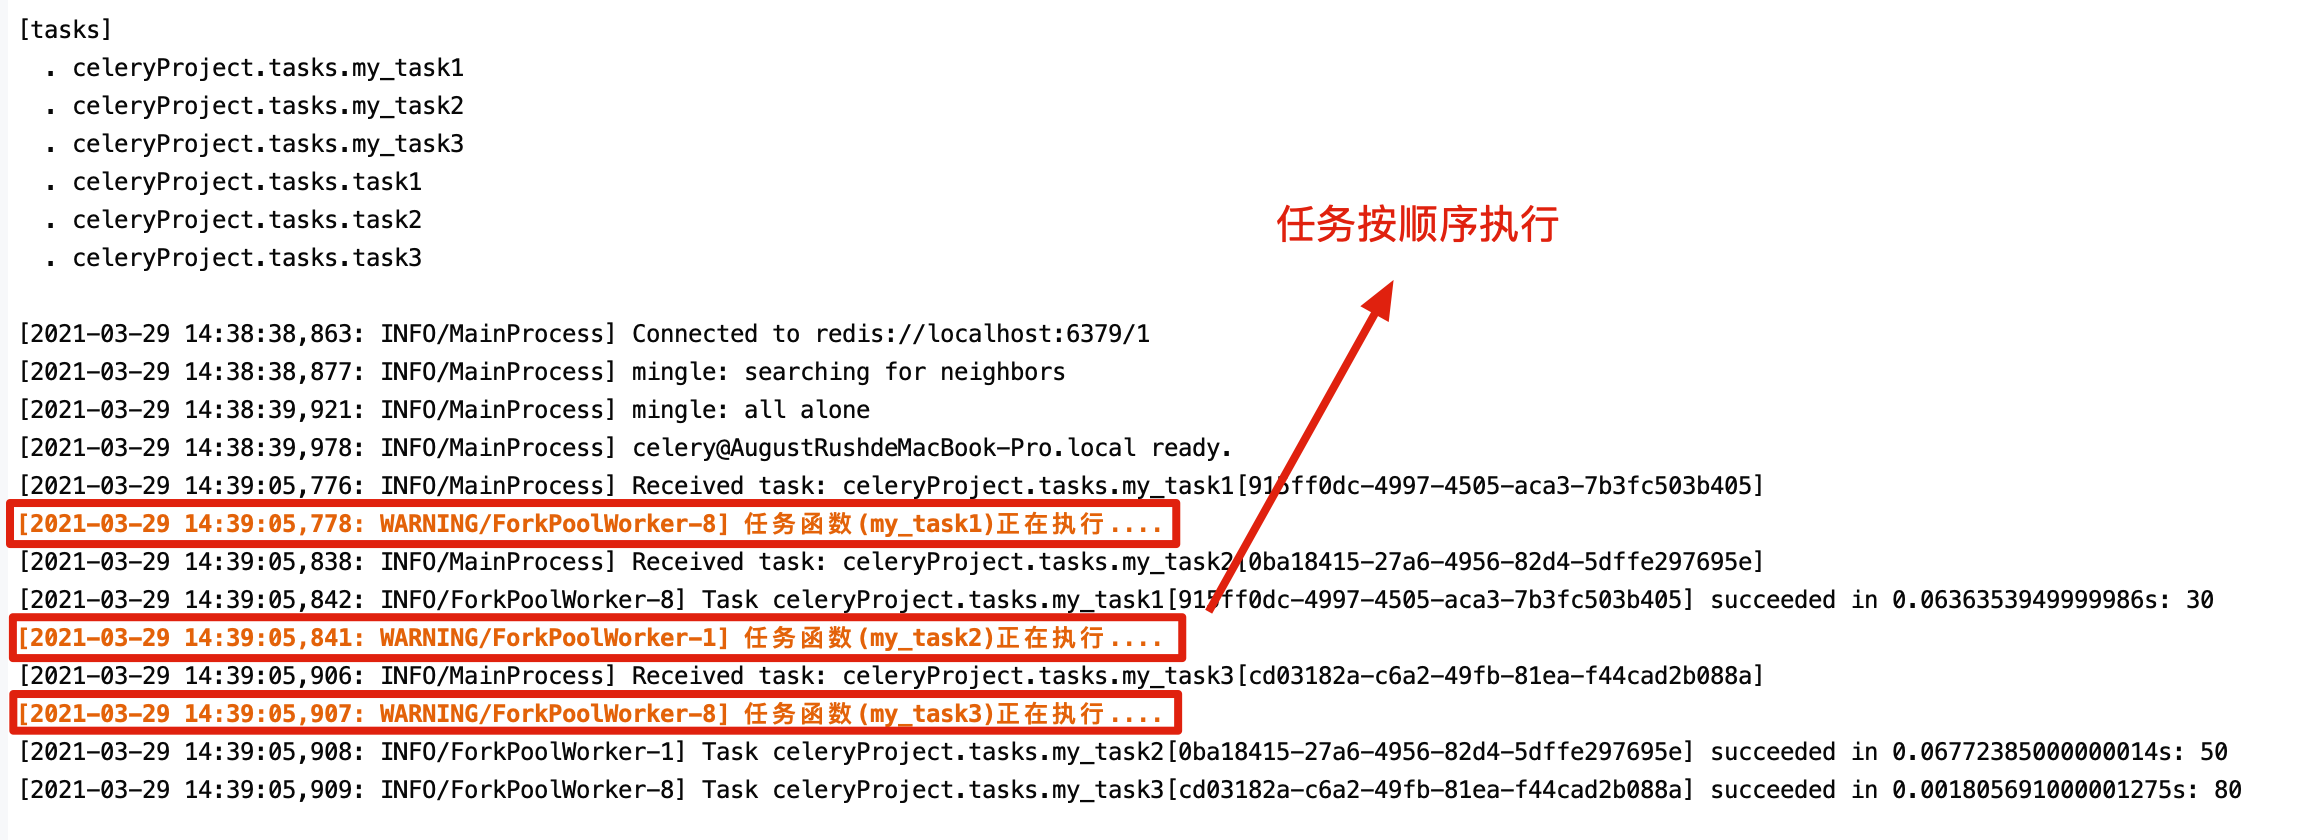
# my_task1的运行结果将会传递给my_task2
# my_task2的运行结果会传递给my_task3
my_chain = chain(my_task1.s(10, 10) | my_task2.s(20) | my_task3.s(30))
ret = my_chain()  # 执行任务链
print(ret.get())  # 输出最终结果

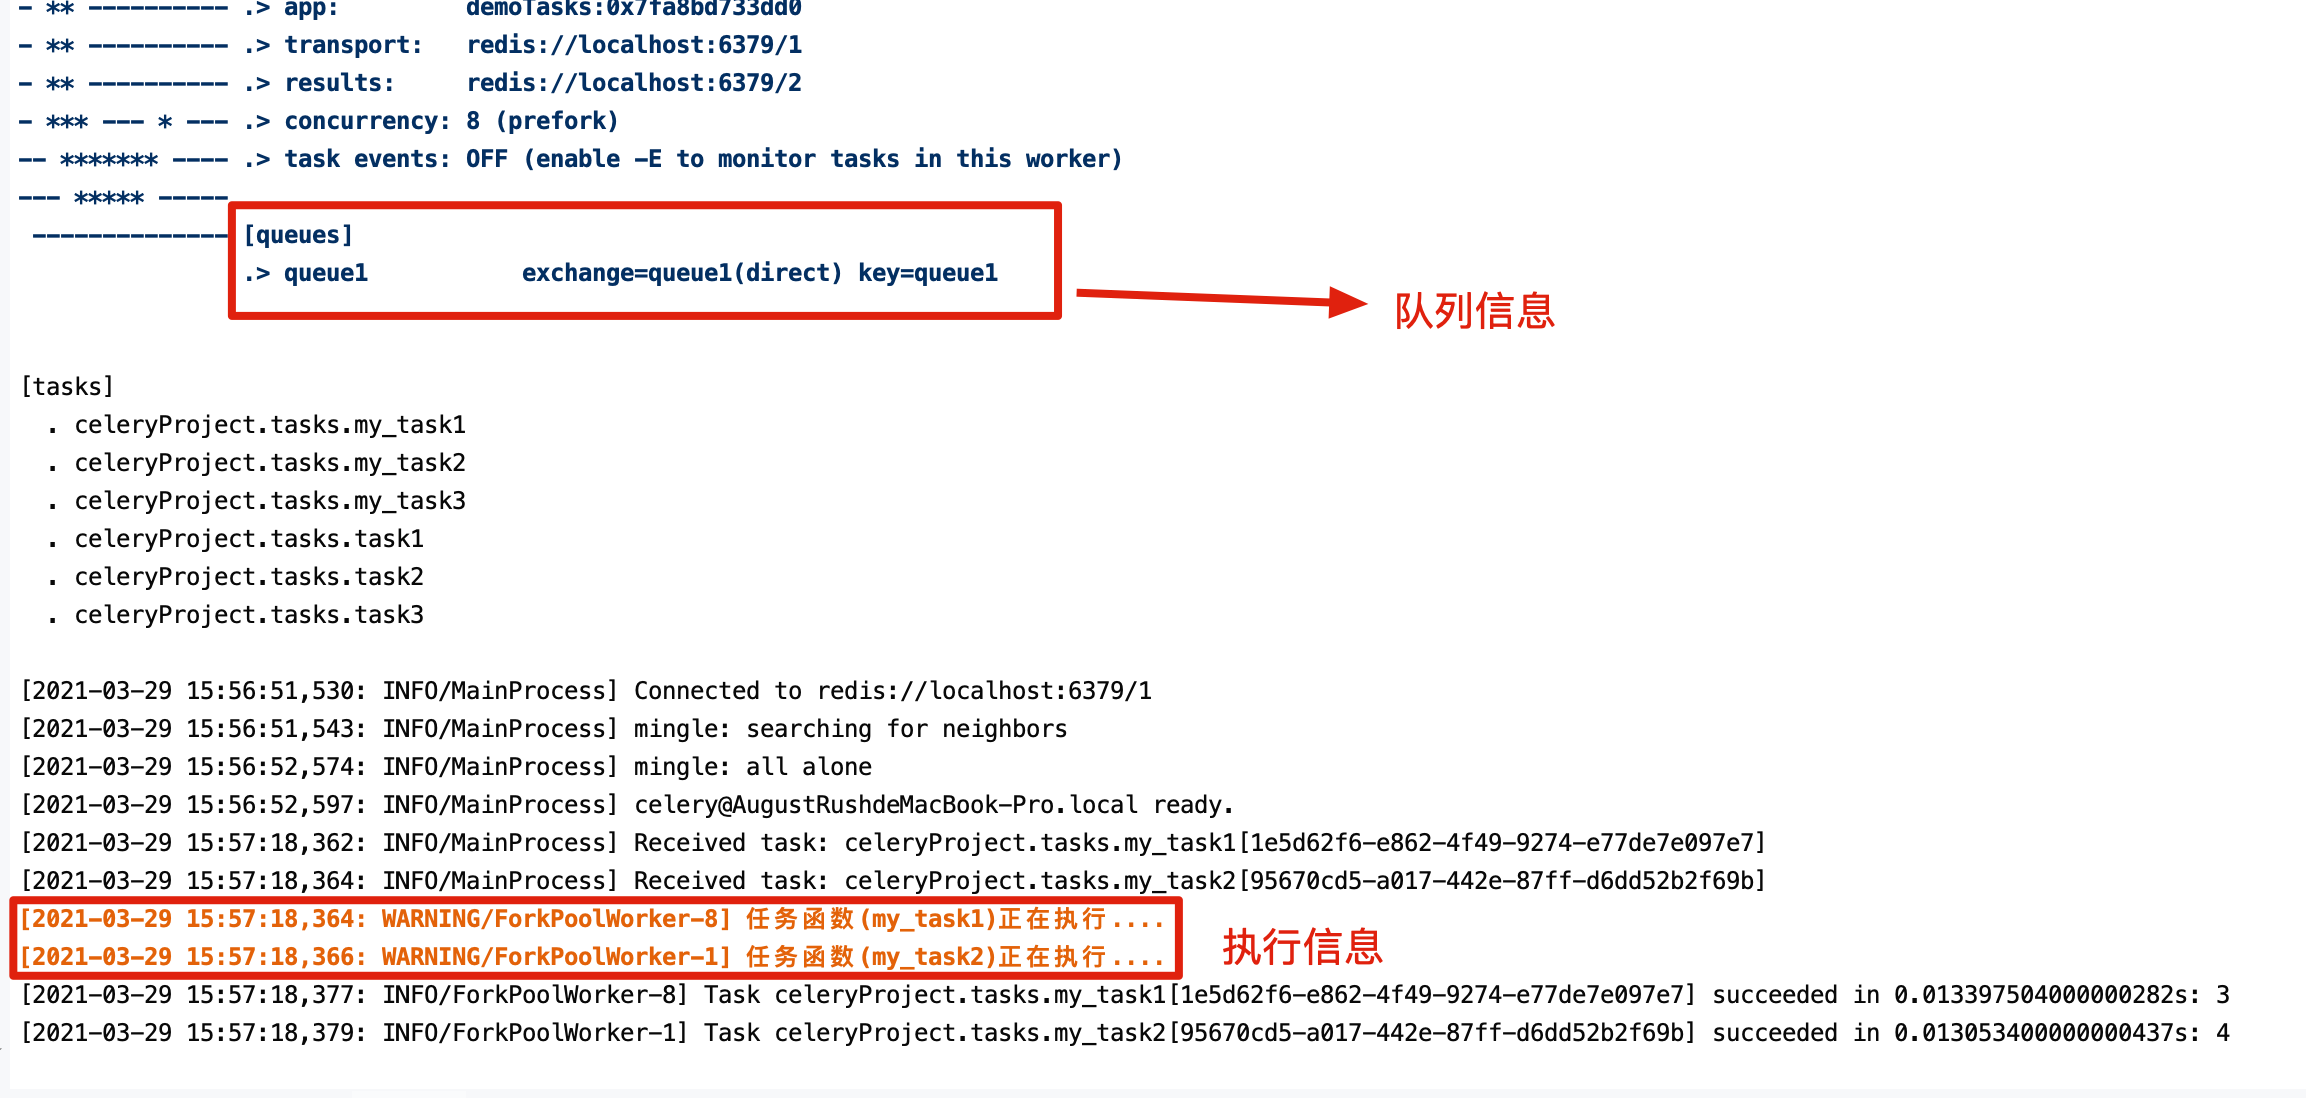
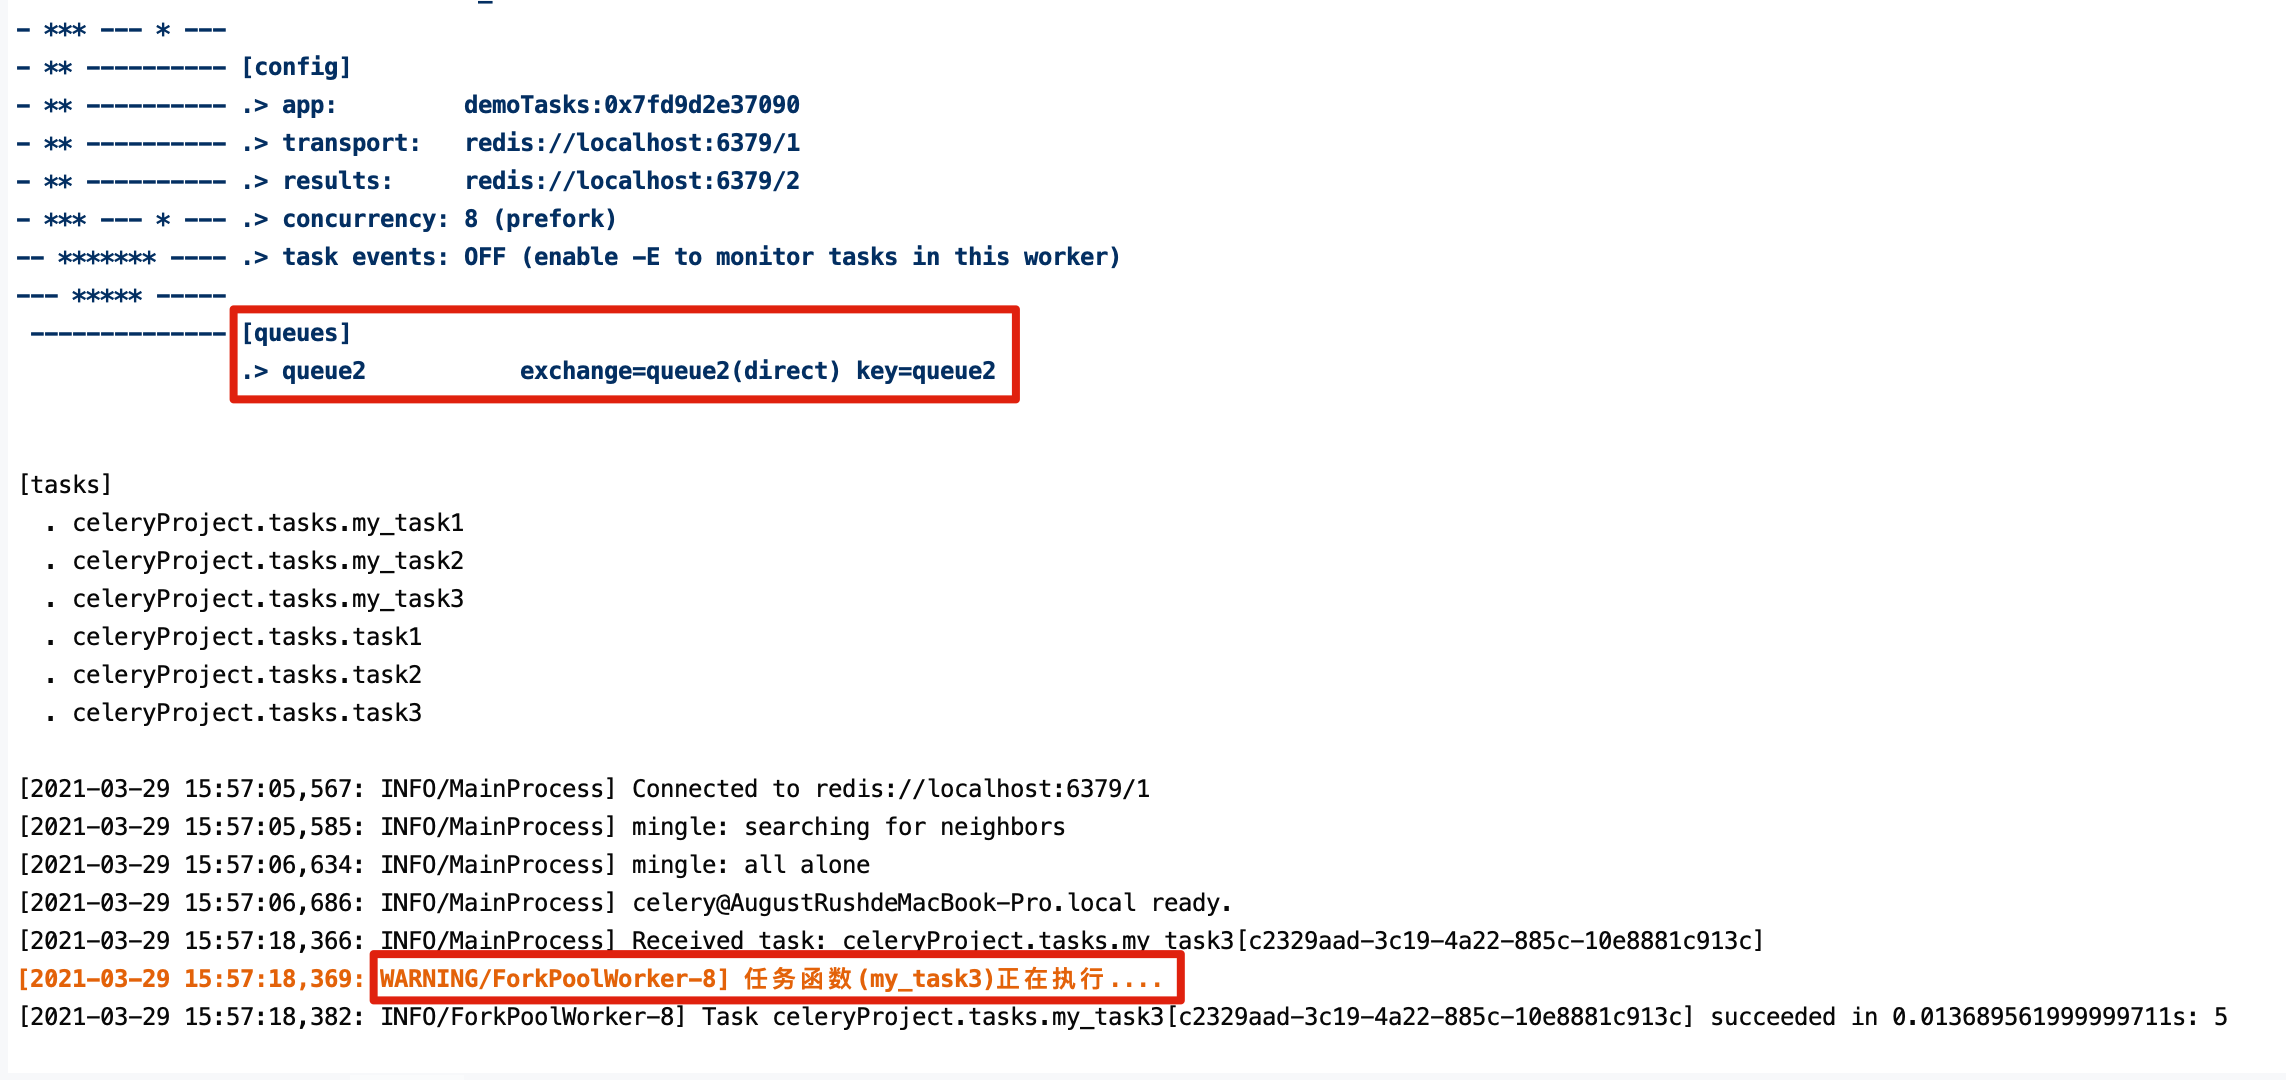
假如我们有两个worker,一个worker专门用来处理邮件发送任务和图像处理任务,一个worker专门用来处理文件上传任务。
可以通过创建两个队列,一个专门用于存储邮件任务队列和图像处理,一个用来存储文件上传任务队列。
Celery支持AMQP(Advanced Message Queue)所有的路由功能,我们也可以使用简单的路由设置将指定的任务发送到指定的队列中。
我们需要配置在celeryconfig.py模块中配置CELERY_ROUTES项。
tasks.py
from proj.celery import app as celery_app


@celery_app.task
def my_task1(a, b):
    print("my_task1任务正在执行....")
    return a + b


@celery_app.task
def my_task2(a, b):
    print("my_task2任务正在执行....")
    return a + b


@celery_app.task
def my_task3(a, b):
    print("my_task3任务正在执行....")
    return a + b
我们通过配置,将send_email和upload_file任务发送到queue1队列中,将image_process发送到queue2队列中。
celeryconfig.py
broker_url='redis://:@127.0.0.1:6379/1'
result_backend='redis://:@127.0.0.1:6379/2'

# 目前有问题 TODO
# task_routes=({
#     'proj.tasks.my_task1': {'queue': 'queue1'},
#     'proj.tasks.my_task2': {'queue': 'queue1'},
#     'proj.tasks.my_task3': {'queue': 'queue2'},
#     },
# )
routing_work.py
from celeryProject.tasks import *

my_task1.apply_async((1, 2), queue='queue1')
my_task2.apply_async((1, 3), queue='queue1')
my_task3.apply_async((1, 4), queue='queue2')
celery beat是一个调度程序;它定期启动任务,然后由集群中的可用节点执行任务。
默认情况下会从配置中的beat_schedule项目中获取条目(entries),但是也可以使用自定义存储,例如将entries存储在数据库中。
应确保一次只运行一个调度程序来执行一个调度程序,否则最终将导致重复的任务。使用集中式方法意味着世界表不必同步,并且该服务可以在不使用锁的情况下运行。
celeryconfig.py
broker_url='redis://:@127.0.0.1:6379/1'
result_backend='redis://:@127.0.0.1:6379/2'


# 配置周期性任务, 或者定时任务
beat_schedule = {
    'every-5-seconds':
        {
            'task': 'proj.tasks.my_task8',
            'schedule': 5.0,
            # 'args': (16, 16),
        }
}
apply_async()支持的任何参数。启动worker处理周期性任务:
celery -A celeryProject worker -l info --beat
如果要对执行任务的时间(例如,一天中的特定时间或一周中的某天)进行更多控制,则可以使用crontab调取类型:
celeryconfig.py
from celery.schedules import crontab

beat_schedule = {
    'every-5-minute':
        {
            'task': 'proj.tasks.period_task',
            'schedule': 5.0,
            'args': (16, 16),
        },
    'add-every-monday-morning': {
        'task': 'proj.tasks.period_task',
        'schedule': crontab(hour=7, minute=30, day_of_week=1),
        'args': (16, 16),
    },

}


基于Nginx+Supervisord+uWSGI+Django1.11.1+Python3.6.5构建